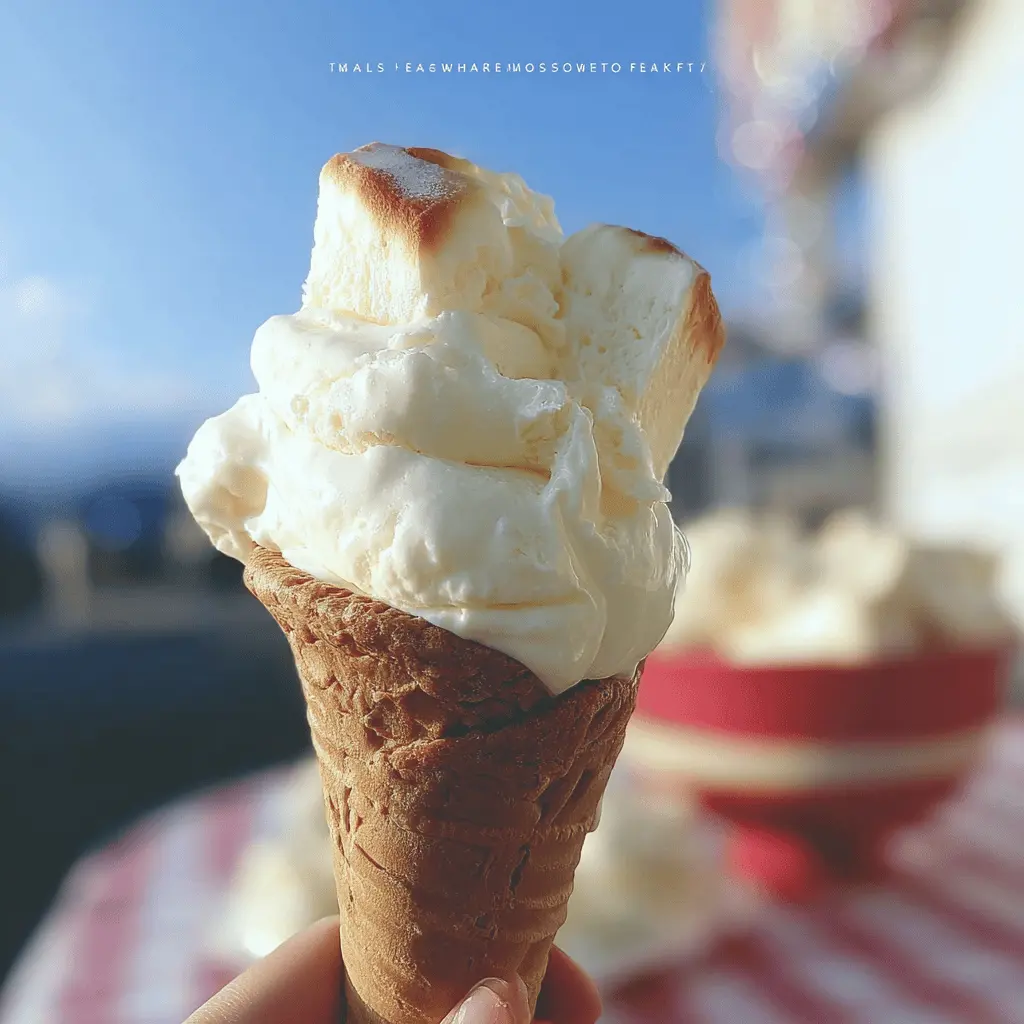
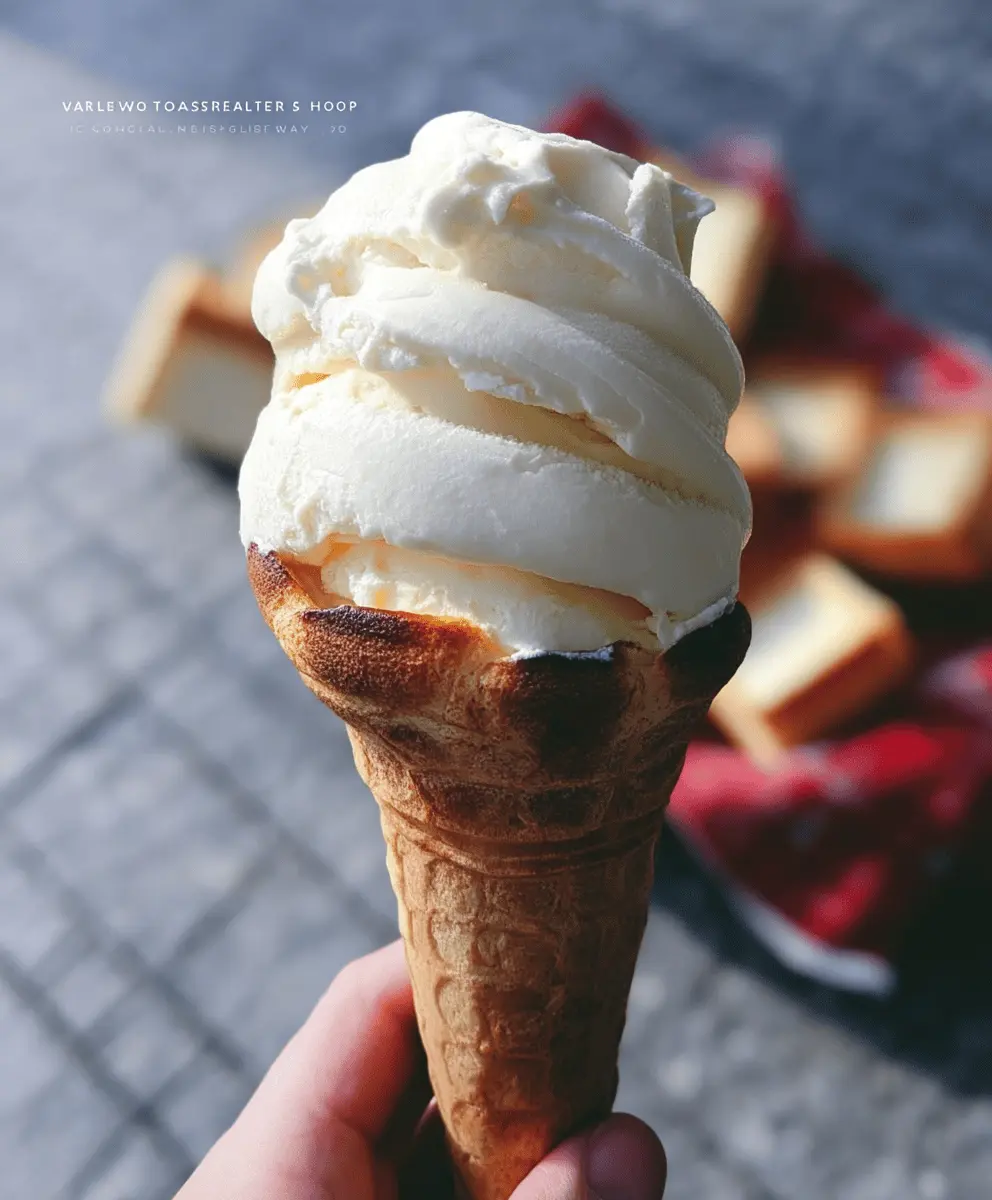
This easy homemade marshmallow ice cream is a treat that will make you smile! It’s creamy, fluffy, and filled with sweet marshmallow flavor—perfect for hot days!
You can’t go wrong with this fun dessert. Just mix, freeze, and enjoy! I love adding sprinkles on top because, let’s face it, they make everything better! 🍦
Key Ingredients & Substitutions
Heavy Whipping Cream: This is crucial for that light and fluffy ice cream texture. If you’re looking to lighten it up, you can use half-and-half, but the ice cream will be less creamy.
Sweetened Condensed Milk: This adds the perfect sweetness and creaminess. If you want a dairy-free option, consider using coconut condensed milk, which has a rich flavor.
Mini Marshmallows: The classic choice for mix-ins! If you can’t find mini marshmallows, regular marshmallows can be cut into smaller pieces. You could also try using marshmallow fluff for a smoother ice cream texture.
Vanilla Extract: Vanilla adds great flavor. You can substitute with almond extract or any flavored extract you like for a different twist!
How Do I Get the Marshmallows Perfectly Toasted?
Toasting marshmallows enhances their flavor and gives a great texture contrast in the ice cream. Here’s how to do it easily:
- If using a kitchen torch, hold it a couple of inches away and move it continuously until they turn golden brown.
- If broiling, place marshmallows on a baking sheet and keep an eye on them to prevent burning, removing them as they achieve that beautiful brown color!
Let them cool before folding them into the ice cream mixture to avoid melting the cream—you want that delightful bite in your finished ice cream!
Easy Homemade Toasted Marshmallow Ice Cream
Ingredients You’ll Need:
- 2 cups heavy whipping cream
- 1 can (14 ounces) sweetened condensed milk
- 1 teaspoon vanilla extract
- 1 cup mini marshmallows (plus extra for toasting)
How Much Time Will You Need?
This delicious homemade toasted marshmallow ice cream requires about 15 minutes of prep time, plus a freezing time of at least 6 hours or overnight. So, the total time is a bit longer, but the wait will be worth it!
Step-by-Step Instructions:
1. Toast the Marshmallows:
Start by toasting your mini marshmallows. You can do this using a kitchen torch or place them under the broiler in your oven. Keep an eye on them and turn them until they are golden brown and slightly melted. Once toasted, let them cool for a bit.
2. Whip the Cream:
In a large mixing bowl, pour in the heavy whipping cream. Using a hand mixer or a stand mixer, beat the cream on high speed until stiff peaks form. This makes the ice cream light and fluffy!
3. Combine Ingredients:
Gently add the sweetened condensed milk and vanilla extract to the whipped cream. Use a spatula or wooden spoon to fold everything together carefully. You want to keep the air in the whipped cream, so mix gently!
4. Add Toasted Marshmallows:
Now, take your cooled, toasted mini marshmallows and fold them into the ice cream mixture. If you’d like, save a few for topping later. Mix until evenly distributed.
5. Freeze:
Pour the ice cream mixture into a freezer-safe container. Smooth the top and cover it with a lid or plastic wrap. Place it in the freezer and let it freeze for at least 6 hours, or overnight until firm.
6. Serve:
When you’re ready to enjoy your homemade toasted marshmallow ice cream, scoop it into waffle cones or bowls. For a special touch, garnish with the extra toasted marshmallows you set aside on top. Dig in and savor every delicious bite!
This no-churn recipe brings the rich creaminess of ice cream and the nostalgic flavor of toasted marshmallows right to your kitchen—perfect for a sunny day or a special treat!
Short FAQ for Easy Homemade Toasted Marshmallow Ice Cream
Can I Use Whipped Topping Instead of Heavy Cream?
While whipped topping can be used for a quick fix, it won’t give you the same creamy texture as heavy whipping cream. For the best results, stick with heavy cream to achieve that delightful fluffiness!
How Can I Store Leftover Ice Cream?
Store any leftover ice cream in an airtight container in the freezer. It will keep well for about 2 weeks. To re-scoop, let it sit at room temperature for a few minutes to soften slightly before serving.
Can I Make This Ice Cream Without an Ice Cream Maker?
Absolutely! This recipe is no-churn, so you don’t need an ice cream maker. Just follow the steps as outlined, and you’ll have delicious ice cream without any special equipment!
What If I Want to Make a Lower-Sugar Version?
You can try using sugar-free sweetened condensed milk for a lower-sugar alternative. Keep in mind that the texture and flavor may vary slightly, but it should still be delicious!