This easy homemade zucchini relish is a tasty way to use up those garden zucchinis! With just a few ingredients like onions, peppers, and vinegar, it’s a cinch to make.
Trust me, everyone will want your secret when they taste this sweet and tangy delight! I love to put it on burgers or enjoy it with crackers. Perfect for brightening up meals!
Key Ingredients & Substitutions
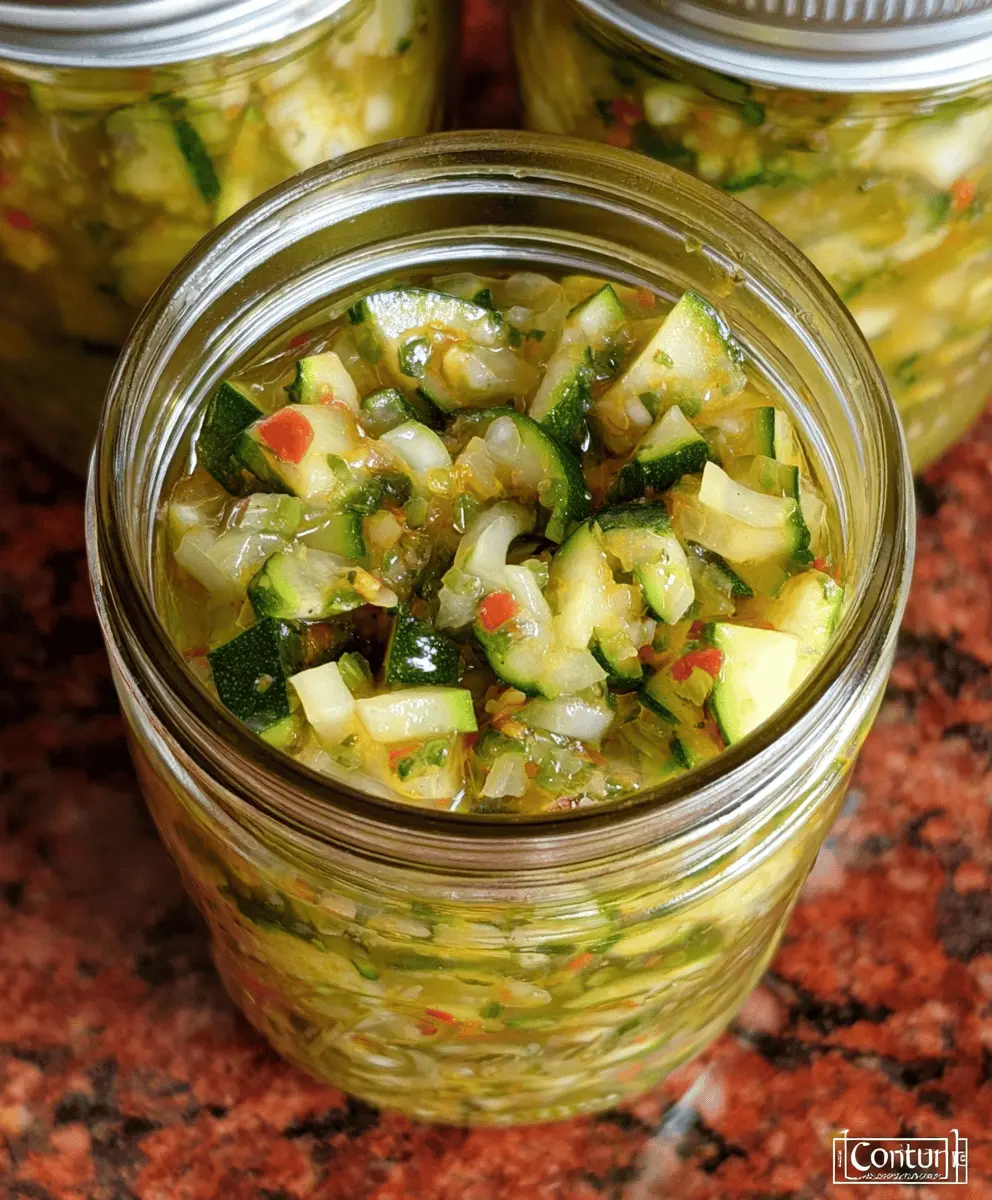
Zucchini: Fresh zucchini is the star here, and about 6 medium ones give you 8 cups chopped. No zucchini? Try using yellow squash instead; the flavor is similar!
Onions: I used yellow onions for their balanced sweetness. If you’re sensitive to onions, consider using green onions or even shallots for a milder taste.
Bell Peppers: Green and red peppers add great color and flavor. If you’re looking to change things up, try using other colors like yellow or orange bell peppers, or even chopped jalapeños for a spicy kick.
Vinegar: White vinegar is best for this relish. If you prefer a slightly different flavor, apple cider vinegar can work well, too, giving a sweeter note.
Sugar: Granulated sugar brings balance to the relish. If you’re watching your sugar intake, you can substitute with honey or a sugar substitute like stevia, but the taste may vary.
How Do You Properly Drain Zucchini for Relish?
Draining the zucchini and other veggies is key to preventing a watery relish. When you sprinkle salt and let them sit, it pulls out moisture effectively. Here’s how to do it well:
- Use a large bowl to mix your chopped vegetables with salt and cover them to let them rest for 2 hours.
- After this resting period, drain the mixture in a colander.
- For extra moisture removal, press down lightly on the veggies with a plate or clean kitchen towel before proceeding with your recipe.
This step really enhances the texture of your relish and ensures it holds up well during canning. Don’t skip it!
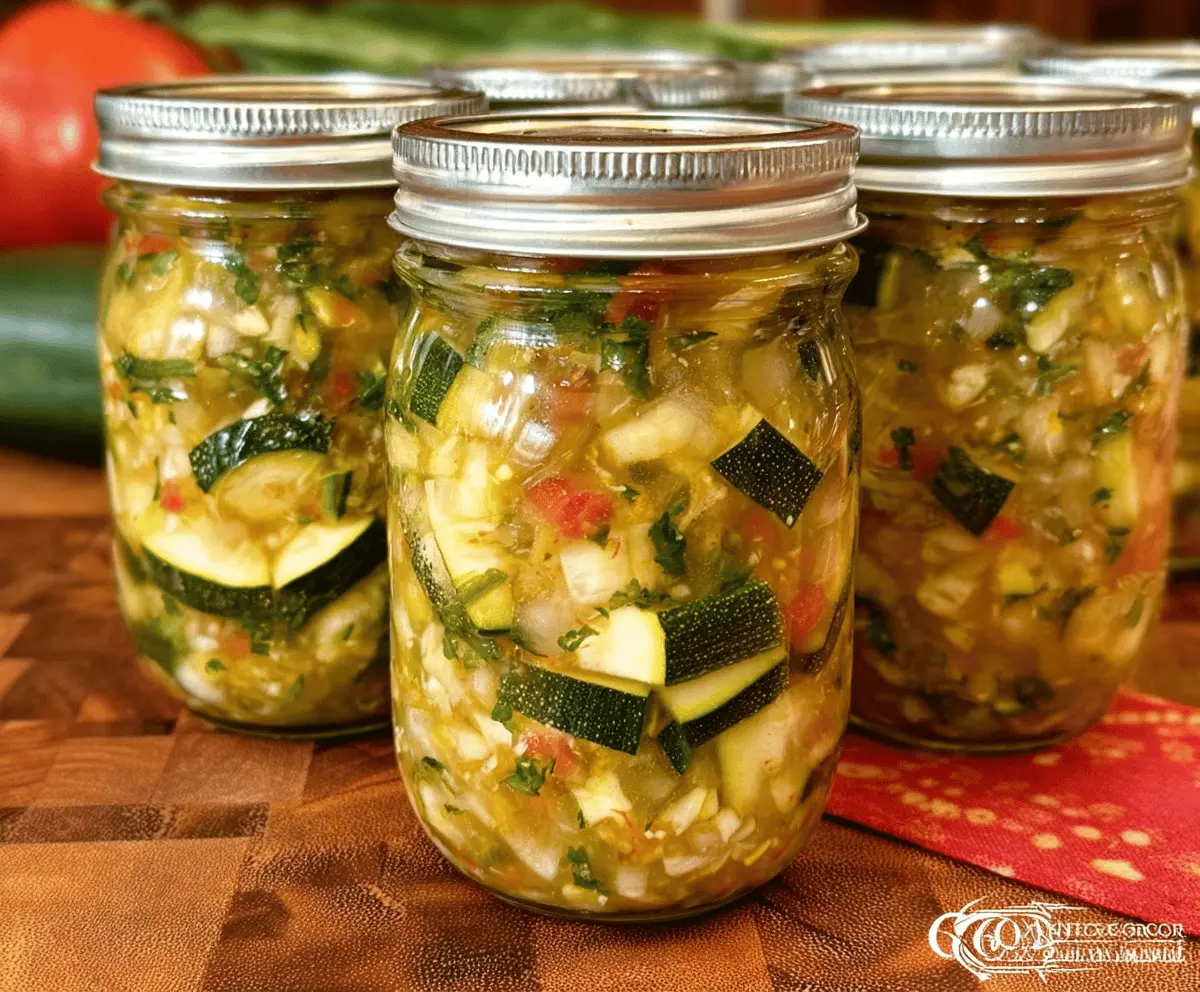
Easy Homemade Zucchini Relish Recipe for Canning
Ingredients You’ll Need:
Vegetables:
- 8 cups finely chopped zucchini (about 6 medium zucchinis)
- 4 cups finely chopped onions (about 4 medium onions)
- 2 cups chopped green bell pepper (about 2 medium peppers)
- 2 cups chopped red bell pepper (about 2 medium peppers)
Seasonings and Preservatives:
- 1/4 cup salt
- 3 cups white vinegar (5% acidity)
- 2 cups granulated sugar
- 1 tablespoon mustard seeds
- 1 tablespoon celery seeds
- 1 teaspoon turmeric powder
How Much Time Will You Need?
This recipe takes about 2 hours and 45 minutes total. You’ll spend around 15 minutes prepping and mixing the ingredients, then let the veggies sit for 2 hours to drain. After that, cooking the relish takes about 25 minutes, with an additional hour for sterilizing jars and processing. Finally, allow the jars to cool completely. In total, it’s a bit of a time commitment, but the result is oh-so-worth it!
Step-by-Step Instructions:
1. Prepare the Vegetables:
Start by placing the chopped zucchini, onions, green bell pepper, and red bell pepper in a large bowl. Sprinkle the mixture with salt, stirring to coat everything well. Cover the bowl and let it sit for 2 hours. This will help to draw out excess moisture from the vegetables. After 2 hours, drain the mixture in a colander and press it down slightly to remove any additional liquid.
2. Cook the Relish:
In a large pot, combine the drained vegetables with the white vinegar, granulated sugar, mustard seeds, celery seeds, and turmeric powder. Stir everything together until well mixed. Heat the pot over medium-high heat until it comes to a boil. Once boiling, reduce the heat and let it simmer uncovered for about 20 to 25 minutes. Stir occasionally to prevent sticking, allowing the relish to thicken and the veggies to become tender.
3. Sterilize Jars:
While your relish is cooking, it’s time to prepare your canning jars. Place clean jars and lids in a large pot of boiling water for about 10 minutes to sterilize them. Keep the jars hot until you’re ready to fill them; this helps create a better seal.
4. Jar the Relish:
Once the relish has cooked down, carefully ladle the hot mixture into the hot sterilized jars. Be sure to leave about 1/2 inch of headspace at the top. Use a clean damp cloth to wipe any spills off the jar rims to ensure a good seal.
5. Seal and Process:
Place the sterilized lids on top of the jars and screw on the bands until they are fingertip tight. Next, process the jars in a boiling water bath for 10 minutes. Note that you may need to adjust the processing time if you live at a higher altitude.
6. Cool and Store:
After processing, carefully remove the jars from the water bath and place them on a towel or cooling rack. Allow the jars to cool completely. After 24 hours, check the seals by pressing down on the center of the lids; they should not flex up and down. If sealed, store them in a cool, dark place. If any jars didn’t seal properly, store them in the fridge and use them within a few weeks.
7. Enjoy!
Before you dig in, let your relish sit for at least a week to develop its flavor. It’s perfect for topping burgers, sandwiches, or enjoying with crackers!
This recipe yields about 6 to 8 pints of delicious homemade zucchini relish that’s perfect for canning and preserving!
Frequently Asked Questions (FAQ)
Can I Use Other Vegetables in This Zucchini Relish?
Absolutely! You can incorporate other vegetables like carrots or even corn for a twist. Just ensure to chop them finely, so they cook evenly and blend well with the zucchini.
How Should I Store Leftover Relish After Opening?
Once opened, store any leftover relish in the fridge in an airtight container. It should stay fresh for about 2 to 3 weeks. Just give it a good stir before using!
Can I Reduce the Sugar in This Recipe?
You can lower the sugar if you prefer a less sweet relish, but this may affect the balance of flavors and preservation. A good starting point is to reduce it by 1/2 cup and adjust to taste during cooking.
What If My Jars Don’t Seal Properly?
If any jars don’t seal, don’t worry! Simply place them in the fridge and use them within a few weeks. For any that sealed, they can be stored in a cool, dark place for up to a year.