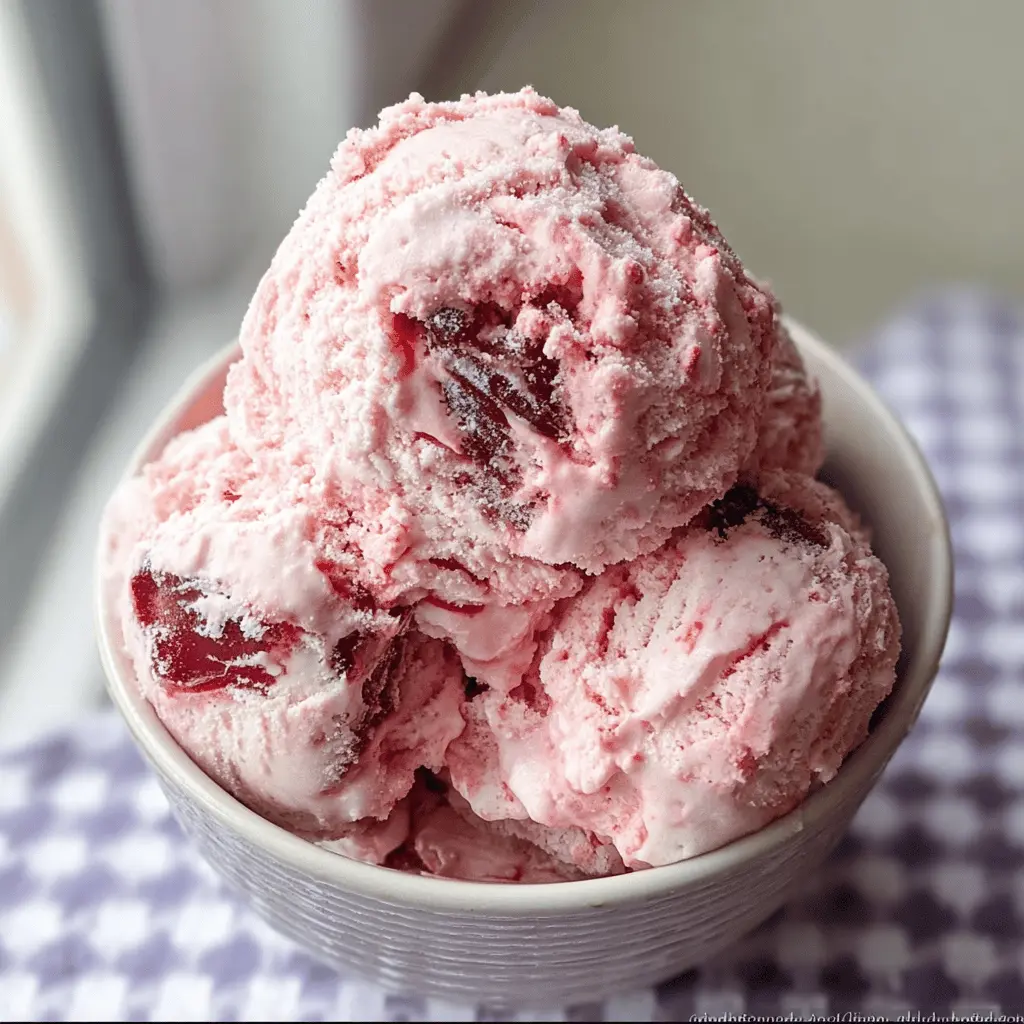
This easy homemade cherry vanilla ice cream is creamy and bursting with cherry flavor. It’s like summer in a bowl, perfect for cooling off on a hot day!
I love how simple it is to whip up at home. Just toss in the cherries, cream, and vanilla, then let it mix. You’ll feel like a dessert hero every time you serve it! 🍦
Key Ingredients & Substitutions
Cherries: Fresh cherries are fantastic, but frozen ones work too! Just make sure to thaw and drain them a bit. If cherry season isn’t available, feel free to use other fruits like raspberries or strawberries for a different twist.
Sugar: Granulated sugar is a must for sweetness, but you can substitute with honey or maple syrup if you prefer a natural sweetener. Just keep in mind that this might alter the flavor slightly.
Heavy Cream: This ingredient gives your ice cream that rich, creamy texture. If you want a lighter option, try half-and-half, but the final texture won’t be as creamy. Coconut cream is also a great dairy-free choice!
Vanilla Extract: Pure vanilla extract boosts the flavor. If you don’t have it, vanilla bean paste is an excellent substitute. For a twist, use almond extract, but start with a smaller amount as it’s stronger than vanilla.
How Do I Achieve the Perfect Ice Cream Texture?
To get that smooth and creamy texture that everyone loves, churning is key. Here’s how to nail the process:
- Ensure your ice cream maker bowl is fully frozen before use. This helps it freeze faster and keep the texture smooth.
- Churn the mixture until it’s at a soft-serve consistency; this usually takes about 20-25 minutes. Don’t churn too long, or you’ll end up with butter!
- When adding the cherry mixture during churning, do it gradually. This helps create those beautiful swirls instead of completely mixing in the cherries.
- After churning, transfer the ice cream to an airtight container and press a piece of parchment paper against the surface before freezing. This helps prevent ice crystals from forming.
With these tips, you’ll have homemade cherry vanilla ice cream that’s smooth, creamy, and full of flavor. Enjoy the process!
Easy Homemade Cherry Vanilla Ice Cream
Ingredients You’ll Need:
For the Ice Cream Base:
- 2 cups fresh or frozen cherries, pitted and halved
- 3/4 cup granulated sugar, divided
- 1 tablespoon lemon juice
- 2 cups heavy cream
- 1 cup whole milk
- 1 tablespoon pure vanilla extract
- Pinch of salt
Time Needed:
This recipe takes about 15 minutes to prep, plus around 30 minutes for churning, and at least 4 hours for freezing. So total time is about 4 hours and 45 minutes, but most of that time is just letting it freeze!
Step-by-Step Instructions:
1. Prepare the Cherry Mixture:
In a medium saucepan over medium heat, combine the cherries, 1/4 cup of sugar, and lemon juice. Cook this mixture for about 10 minutes until the cherries break down and release their juicy goodness. Once they’re nice and soft, remove from heat and let it cool. If you like, you can mash the cherries a bit for a sauce with some chunky bits in it!
2. Mix the Ice Cream Base:
In a mixing bowl, whisk together the heavy cream, whole milk, the remaining 1/2 cup of sugar, the vanilla extract, and a pinch of salt. Keep whisking until the sugar is fully dissolved and everything is well combined.
3. Churn the Ice Cream:
Pour the creamy mixture into your ice cream maker. Follow the manufacturer’s instructions to churn until it reaches a soft-serve consistency. This usually takes about 20-30 minutes. Remember, it should look thick but still soft!
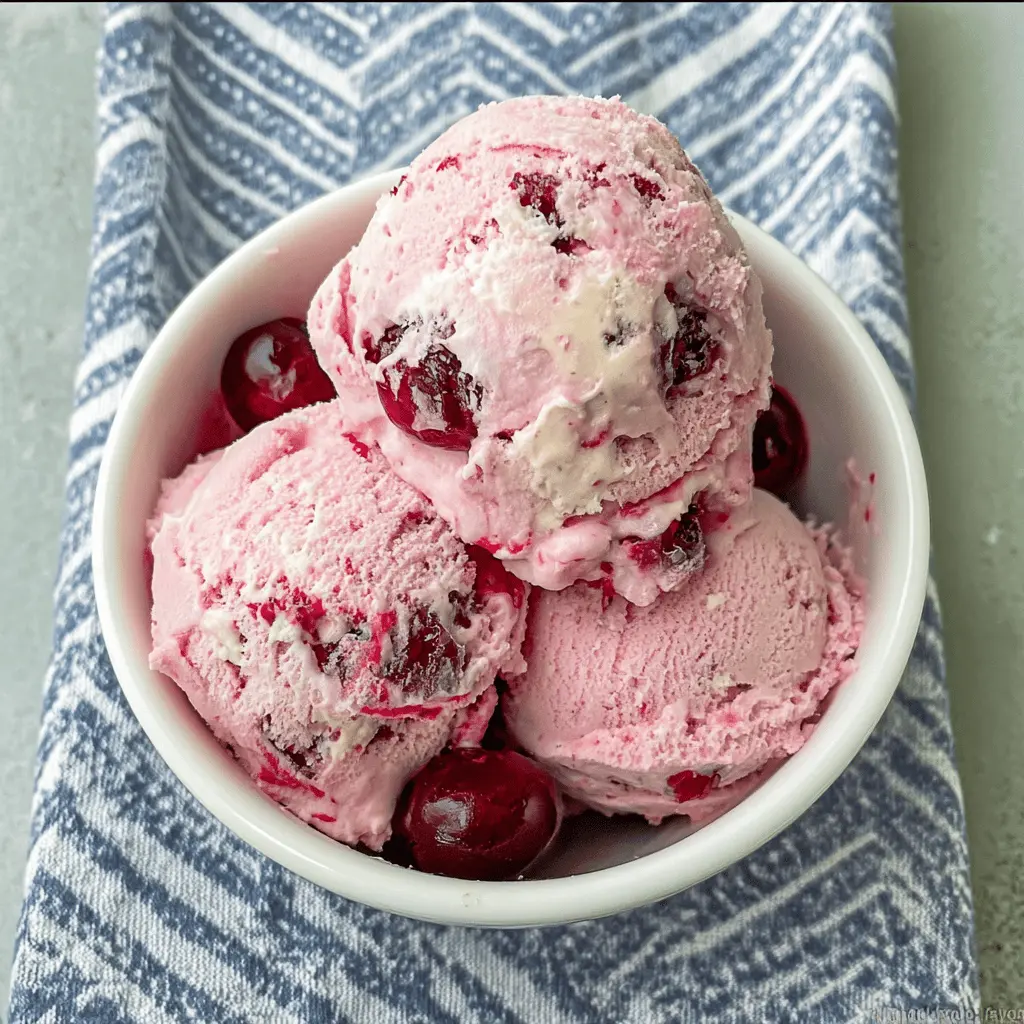
4. Add the Cherry Swirls:
In the last few minutes of churning, slowly add in the cherry mixture. This way, you’ll create beautiful swirls and chunks of cherries throughout your ice cream, instead of just mixing them completely in.
5. Freeze the Ice Cream:
Once it’s churned, transfer the ice cream to an airtight container. Make sure to spread it out evenly. Freeze it for at least 4 hours or until it’s nice and firm. This step will give you that scoopable texture!
6. Serve & Enjoy:
When you’re ready to enjoy, just scoop out portions into bowls and serve chilled. You can even top it with some extra cherry sauce or whipped cream for a yummy treat!
This homemade cherry vanilla ice cream is not only creamy and dreamy but also packed with lovely cherry flavor. Perfect for summer days or any special occasion. Enjoy every bite!
Frequently Asked Questions (FAQ)
Can I Use Frozen Cherries Instead of Fresh?
Absolutely! Frozen cherries work great in this recipe. Just make sure to thaw them beforehand and drain any excess liquid. It’ll still provide that yummy cherry flavor!
What If I Don’t Have an Ice Cream Maker?
No worries! You can still make this ice cream without one. Simply pour the mixture into a shallow dish, freeze for about 2 hours, then stir it every 30 minutes with a fork to break up ice crystals until it’s fully frozen. This may take about 4 hours total.
How Long Can I Store Leftover Ice Cream?
Your homemade cherry vanilla ice cream can be stored in the freezer for up to 2 weeks. Make sure it’s in an airtight container to prevent freezer burn. Just let it sit at room temperature for a few minutes to soften before scooping if it gets too hard.
Can I Experiment with Other Flavors?
Of course! This base recipe is very versatile. Try substituting the cherries with other fruits like strawberries or raspberries. You could even mix in some chocolate chips or nuts for a fun twist!