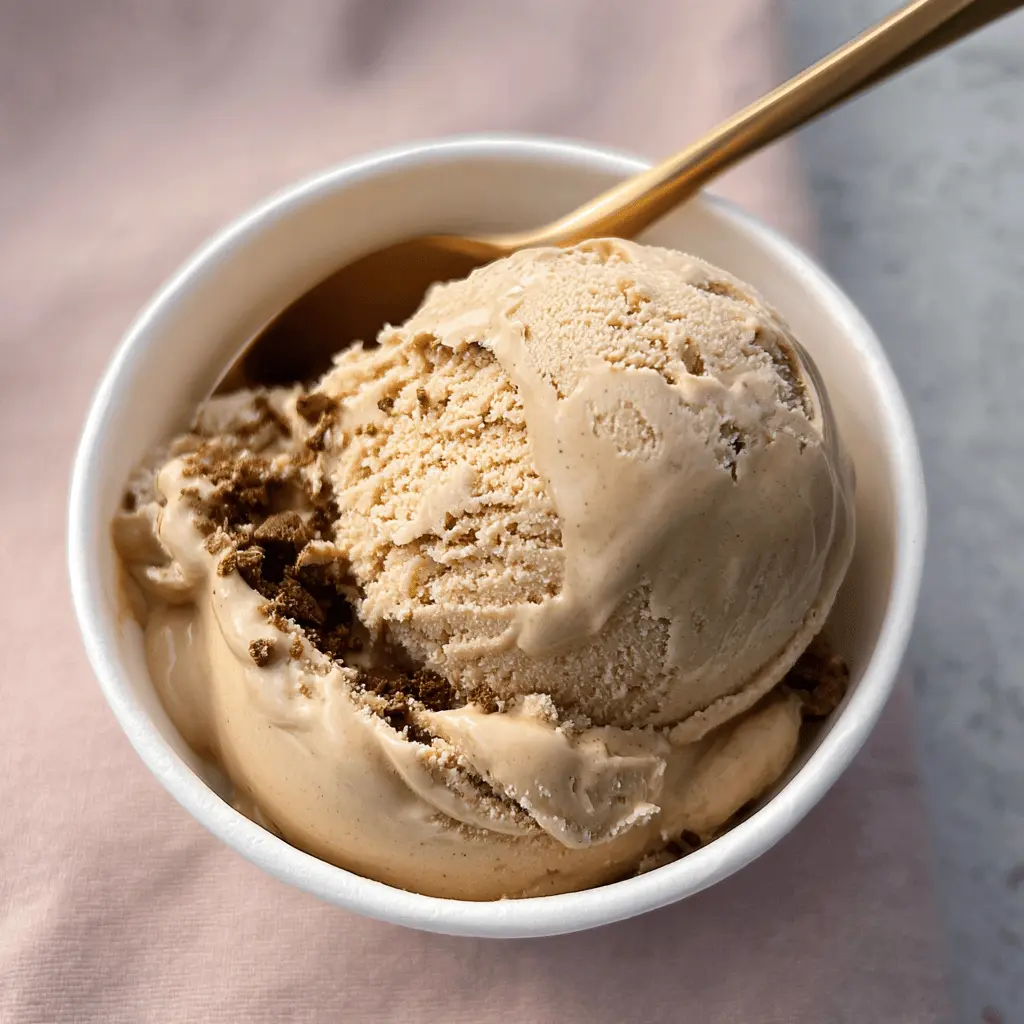
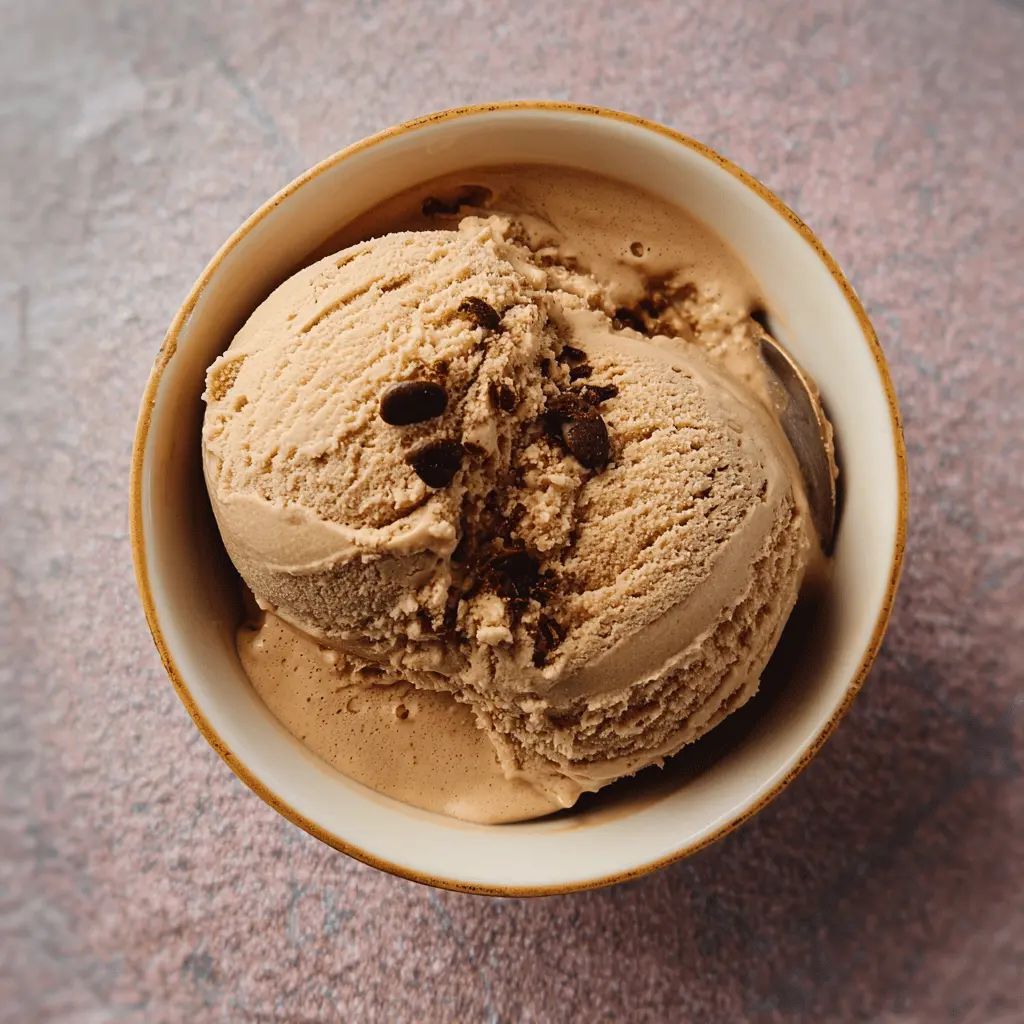
This Easy Bold Coffee Ice Cream is the perfect treat for coffee lovers! It’s rich, smooth, and oh-so-creamy, making it a sweet escape on hot days.
Making this ice cream is a breeze. Just mix your coffee with cream, freeze it, and enjoy! I love scooping it up on warm evenings while pretending I’m at a fancy cafe. ☕️🍦
Key Ingredients & Substitutions
Heavy Cream: This is key for a rich and creamy texture. If you’re looking for a lighter version, you can substitute half and half, but the ice cream will be less creamy. Coconut cream is a great dairy-free option if you want to skip dairy entirely!
Whole Milk: Whole milk adds creaminess too. You can use 2% milk for fewer calories, but it might not be as rich. Almond milk or oat milk can work as dairy-free alternatives.
Granulated Sugar: White sugar is standard, but you can swap in brown sugar for a deeper flavor. If you’re cutting sugar, a sugar substitute like stevia may work, but check the conversion ratios.
Strong Brewed Coffee: A dark roast or espresso really makes this ice cream pop! If you’re not a coffee lover, try using brewed tea for a different flavor, like chai or matcha.
Vanilla Extract: Vanilla enhances the flavors. You can use a whole vanilla bean for a more intense flavor or skip it entirely if you’re in a pinch.
How Do I Achieve the Creamiest Texture in My Ice Cream?
For silky smooth ice cream, proper churning is essential. Using an ice cream maker helps incorporate air, creating that creamy texture. Here’s how to make sure you do it right:
- Ensure your ice cream maker’s bowl is fully frozen before pouring in the mixture.
- Don’t overfill the machine; leave space for the ice cream to expand as it churns.
- Churn until it reaches soft-serve consistency, which usually takes about 20-25 minutes.
- For the best texture, freeze the ice cream for several hours after churning. This firms it up nicely.
By following these steps, you’re on your way to making delicious and creamy coffee ice cream that everyone will love!
Easy Bold Coffee Ice Cream
Ingredients You’ll Need:
- 2 cups heavy cream
- 1 cup whole milk
- 3/4 cup granulated sugar
- 1/2 cup strong brewed coffee, cooled (try espresso or dark roast for a bolder flavor)
- 1 tsp vanilla extract
- Pinch of salt
How Much Time Will You Need?
This delicious coffee ice cream requires about 10 minutes of active preparation time. You’ll need an additional 20-25 minutes to churn the mixture in the ice cream maker and at least 4 hours for it to freeze properly. All in all, you’re looking at about 4 hours and 35 minutes to enjoy this creamy goodness!
Step-by-Step Instructions:
1. Mix the Ingredients:
Start by grabbing a large mixing bowl. Whisk together the granulated sugar, heavy cream, and whole milk until the sugar is fully dissolved. This process will create a smooth base, so take your time with this step!
2. Add Coffee and Flavor:
Next, pour in your cooled strong brewed coffee, vanilla extract, and a pinch of salt. Stir the mixture well until everything is combined. This step is all about working those flavors together.
3. Churn the Mixture:
Now it’s time for the fun part! Pour your coffee cream mixture into an ice cream maker. Churn according to the manufacturer’s instructions, usually about 20-25 minutes, until it becomes a soft-serve consistency. Make sure to keep an eye on it for the perfect texture!
4. Freeze the Ice Cream:
After churning, transfer the ice cream to an airtight container. This is where the magic really happens. Freeze it for at least 4 hours, or until it’s firm enough to scoop. The longer you freeze it, the better!
5. Serve and Enjoy:
Once your ice cream is set, it’s time to scoop! Serve it chilled, and if you’re feeling fancy, top it off with chocolate shavings or coffee beans for that extra flair. Your rich, creamy, and boldly flavored coffee ice cream is ready to be enjoyed!
Indulge in your homemade coffee ice cream and savor every delightful bite!
Frequently Asked Questions (FAQ)
Can I Use Decaffeinated Coffee in This Recipe?
Absolutely! If you’re sensitive to caffeine or just prefer a decaf option, feel free to use decaffeinated coffee. The flavor will still be rich and delicious!
How Can I Store Leftover Ice Cream?
Store any leftover ice cream in an airtight container in the freezer. It can last for up to 2 weeks. Just make sure to let it sit at room temperature for a few minutes before scooping to make it easier to serve.
What If I Don’t Have an Ice Cream Maker?
No worries! You can still make this ice cream without one. Pour the mixture into a shallow dish and freeze it. Every 30 minutes, stir it with a fork to break up any ice crystals until it’s firm and creamy, which should take about 3-4 hours.
Can I Add Mix-Ins to My Ice Cream?
Definitely! Feel free to fold in chocolate chips, crushed cookies, or nuts during the last few minutes of churning for a fun twist. Just don’t overdo it; a little goes a long way!