These Easy Cheeseburger Sliders are mini burgers that everyone will love! With juicy beef, melted cheese, and soft buns, they’re perfect for any gathering.
Making these sliders is a breeze! I love serving them with a side of fries or some crunchy pickles. Trust me, they’re just the right size for a tasty snack! 🍔
Key Ingredients & Substitutions
Ground Beef: I recommend using 80/20 ground beef for juicy sliders. If you’re looking for a leaner option, 85/15 is fine, but the sliders might be less juicy. For a healthier option, ground turkey or chicken can also work, though they might need extra seasoning.
Slider Buns: I love using sesame seed buns for that classic burger flavor. If you’re looking for a healthier twist, try whole wheat or gluten-free buns. You can also use dinner rolls if you can’t find slider buns.
Cheese: Cheddar is a classic choice for these sliders. Feel free to mix it up with American, Swiss, or even pepper jack for a little kick. I sometimes like to add a slice of provolone for a nice touch!
Onion: Chopped onion adds great flavor, but you can skip it if you’re not a fan. Alternatively, use caramelized onions for sweetness or green onions for a milder taste.
Pickles: They add crunch and tang! If you prefer, dill relish can substitute. If you’re avoiding pickles, try sliced jalapeños for a zesty twist.
How Do I Get Perfectly Melted Cheese on My Sliders?
To achieve melted cheese on your sliders, timing and covering them are key. Cook your patties until they’re nearly done, then place a half slice of cheese on each and cover the pan. This traps the heat and helps the cheese melt without overcooking the patties.
- Cook the patties for 2-3 minutes on one side, then flip.
- Add the cheese on top and cover immediately.
- Check after a minute; the steam helps the cheese melt perfectly!
Following these tips will make your sliders even more delicious. Happy cooking!
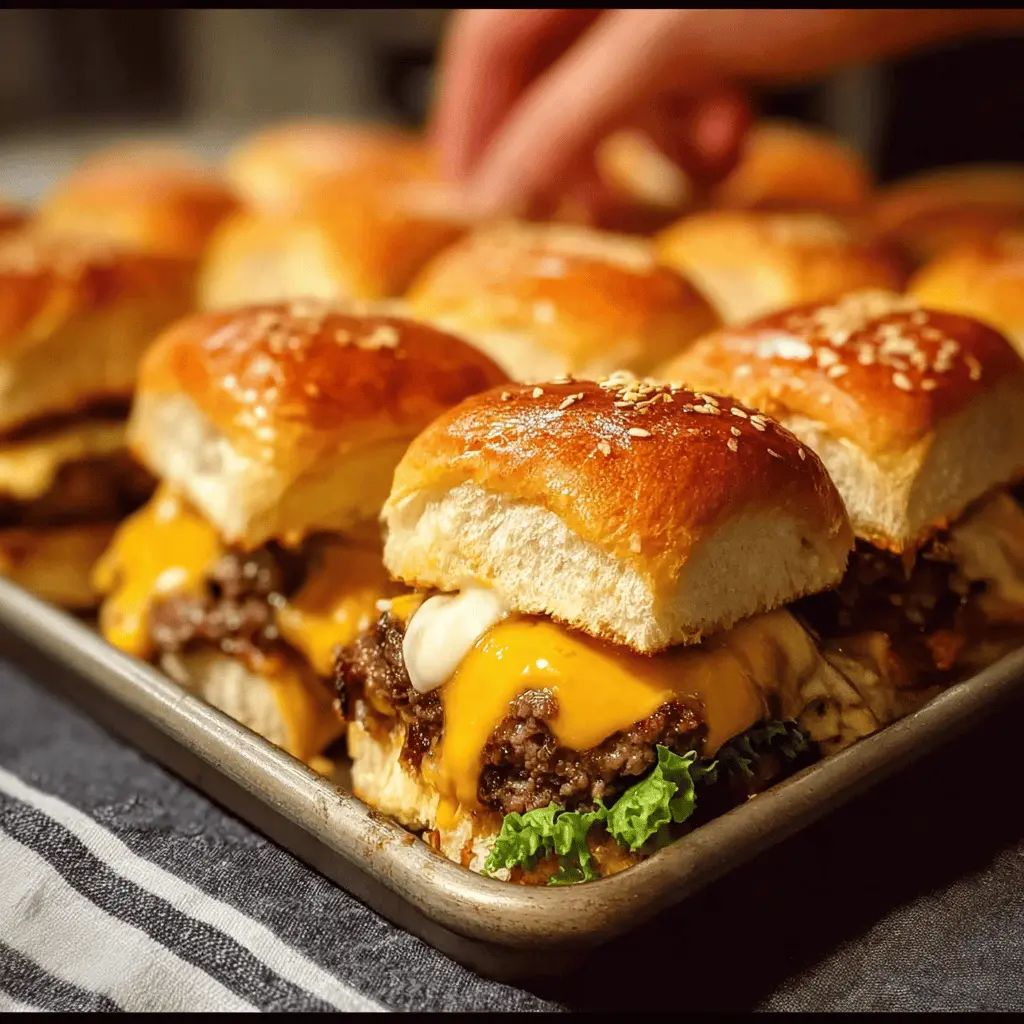
Easy Cheeseburger Sliders
Ingredients You’ll Need:
- 1 lb ground beef (preferably 80/20 for juiciness)
- Salt and pepper, to taste
- 12 slider buns (mini sesame seed buns work great)
- 6 slices cheddar cheese, halved (or your favorite cheese)
- 1 small onion, finely chopped (optional)
- 1/4 cup pickle slices (optional)
- 2 tablespoons butter, melted
- 1 tablespoon ketchup (optional)
- 1 tablespoon mustard (optional)
How Much Time Will You Need?
This recipe will take about 20-25 minutes from start to finish! You’ll need around 5 minutes for prep and about 15-20 minutes for cooking and baking. Quick, easy, and oh-so-tasty!
Step-by-Step Instructions:
1. Preheat the Oven:
Start by preheating your oven to 350°F (175°C). This helps the sliders bake evenly later on.
2. Prepare the Beef:
In a medium bowl, season the ground beef with salt and pepper to taste. If you love onions, add the finely chopped onion as well! Mix everything gently until it’s combined.
3. Shape the Patties:
Divide the beef mixture into 12 equal parts. Shape each part into a small burger patty, slightly larger than the slider buns since they’ll shrink a little while cooking.
4. Cook the Patties:
Heat a skillet or grill pan over medium-high heat. Cook each patty for about 2-3 minutes on one side until it’s nicely browned. Flip the patties and cook for another 2-3 minutes until they reach your desired doneness. (If you like them well done, give them an extra minute or two!)
5. Melt the Cheese:
In the last minute of cooking, place a half-slice of cheddar cheese on top of each patty. Cover the skillet with a lid or foil to help the cheese melt beautifully.
6. Prepare the Buns:
While the patties cook, grab your slider buns. Slice them in half and place the bottom half in a baking dish. This is where all the deliciousness will go!
7. Assemble the Sliders:
Once the patties are cooked and the cheese is melted, place each cheesy patty on the bun bottoms in the dish. If you’d like, add some pickle slices or a little ketchup and mustard on top of the patties.
8. Add the Top Buns:
Place the top halves of the buns over the patties, covering them completely. Now they look just like cute little burgers!
9. Brush with Butter:
Take your melted butter and brush it over the tops of the buns. This will give them a nice golden color and extra flavor as they bake.
10. Bake the Sliders:
Cover the baking dish loosely with foil and bake in the preheated oven for about 10 minutes. This keeps the sliders warm and lets all the flavors melt together.
11. Serve and Enjoy:
Carefully remove the foil, and there you have it—your cheesy, delicious sliders! Serve them warm at your next gathering, game day, or just because you’re craving something tasty!
Bonus Tips!
Feel free to customize your sliders with toppings like lettuce, tomatoes, or special sauces. The possibilities are endless. Enjoy every bite! 🍔

Frequently Asked Questions (FAQ)
Can I Use Ground Turkey or Chicken Instead of Beef?
Absolutely! Ground turkey or chicken can be great substitutes for a leaner option. Just keep in mind that they may require extra seasoning for flavor since they tend to be less fatty than beef.
How Can I Make These Sliders Spicier?
If you want to add some heat, consider mixing diced jalapeños or chopped red pepper flakes into the ground beef. You can also top the sliders with spicy mayo or hot sauce before serving!
Can I Make These Sliders in Advance?
Yes, you can prepare the patties and shape them ahead of time. Store them in the refrigerator for up to a day before cooking. If you want to freeze them, wrap the uncooked patties individually in plastic wrap, and they can be frozen for up to 3 months. Just thaw before cooking.
How Should I Store Leftover Sliders?
If you have any leftovers, store them in an airtight container in the fridge for up to 3 days. To reheat, place them in the oven at 350°F (175°C) for about 10 minutes until warmed through, or use the microwave for 30-60 seconds.